Home » Without Label » How To Install Cabinet Filler Strip : 6" Filler Tray Base Cabinet - Momplex Vanilla Kitchen ... : Masking tape on the filler strip helps the pencil line show up better and protects the finish from the saw table.
How To Install Cabinet Filler Strip : 6" Filler Tray Base Cabinet - Momplex Vanilla Kitchen ... : Masking tape on the filler strip helps the pencil line show up better and protects the finish from the saw table.
How To Install Cabinet Filler Strip : 6" Filler Tray Base Cabinet - Momplex Vanilla Kitchen ... : Masking tape on the filler strip helps the pencil line show up better and protects the finish from the saw table.. The method you use for installing the cabinet fillers is totally up to you. Used cabinets diy cabinets jack and jill bathroom diy headboards deco furniture house projects furnitures powder room room ideas. Using a scriber, mark a line down the filler where you need to cut. Measure the width of the gap you want to conceal at the top and bottom of the cabinet. Clamp the filler strip to the cabinet using a cabinet claw.
In this short video series i go into detail about the three scribes i typically use during installs and in this first part, i concentrate on #scribing #infil. Use cabinet fill strips to fill the gap. One filler is cut at 1 and attached to the cabinet in the shop at assembly with glue and staples. How to install the filler: Use a scribing tool or a compass and pencil to transfer the contour of the wall to the filler strip.
Ikea filler and cover panels | Kitchen | Pinterest ... from s-media-cache-ak0.pinimg.com It is attached flush with the face of the cabinet. The method you use for installing the cabinet fillers is totally up to you. Clamp the filler strip to the cabinet using a cabinet claw. Install blocking on the back) cut down your filler to the dimensions you will need. The other filler is cut at 3 and sent loose to the job site so the installer has plenty of material to work with if the walls are extremely bad. How should i attach the filler to the kitchen or bathroom vanity cabinet? For uneven walls, clamp the filler strip to the outside of the cabinet face. To conceal small gaps between your cabinets and the wall, you can install cabinet filler strips.
Install blocking on the back) cut down your filler to the dimensions you will need.
Custom cabinets are custom measured to fit your home and do not use fillers. Use a scribing tool or a compass and pencil to transfer the contour of the wall to the filler strip. But here the user can get easy tips, tricks, and tools on how to install cabinet filler strips easily. How should i attach the filler to the kitchen or bathroom vanity cabinet? About press copyright contact us creators advertise developers terms privacy policy & safety how youtube works test new features press copyright contact us creators. Cut a piece of corrugated cardboard to match the height of the cabinet and the widest portion of the gap. Clamp the filler strip to the cabinet using a cabinet claw. Use cabinet fill strips to fill the gap. Drill a pilot hole completely through the cabinet frame and partway into the filler strip. Clamp the filler strip to the cabinet using a cabinet claw. Drill a pilot hole completely through the cabinet frame and partway into the filler strip. How to install the filler: The filler strip should be a minimum of 1 1/2 inches wide, 2 inches is even better.
Attach the filler strip to the cabinet with screws driven through the inside edge of the cabinet face frame and into the edge of the filler strip. Drill a pilot hole completely through the cabinet frame and partway into the filler strip. Check for level and install 4 cabinet Masking tape on the filler strip helps the pencil line show up better and protects the finish from the saw table. Leave the correct gaps for appliances.
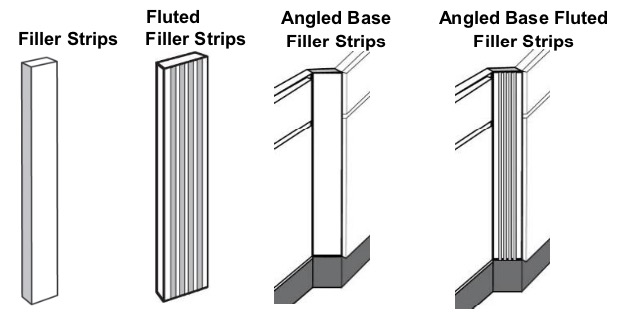
Filler: Filler Strips; Custom Unfinished, Stained or Painted from www.highlandsdesigns.com Drill a pilot hole completely through the cabinet frame and partway into the filler strip. Clamp the filler flush with the front of the cabinet. Cut a piece of corrugated cardboard to match the height of the cabinet and the widest portion of the gap. Clamp the filler strip to the cabinet using a cabinet claw. Clamp the filler onto the cabinet flush with the inside of the vertical rail. Masking tape on the filler strip helps the pencil line show up better and protects the finish from the saw table. To each measurement and draw a cutting line on the backside of a filler strip. Be sure any extra trim and filler strips that you ordered were included in the delivery.
We allow for a 1 filler on both sides of the cabinet.
If it fits snugly, use it as a template and trace its outline onto your filler strip. Measure the gap at the top and the bottom and cut your filler strip to fit. One filler is cut at 1 and attached to the cabinet in the shop at assembly with glue and staples. Verify that the cabinet is level and install 4 cabinet screws through the fastening strip into the wall studs. Leave the correct gaps for appliances. Drill a pilot hole completely through the cabinet frame and partway into the filler strip. Precisely fit and install these strips for a neat, seamless finish. The filler strips can be nailed or screwed from the inside of the cupboard sides or screwed on from the outside. Steps to install filler strips Install blocking on the back) cut down your filler to the dimensions you will need. Use a miter saw to cut the filler strip to the height of your cabinet. Use a table saw to cut the strip just slightly wider than the widest point you measured. See filler installation on page 7.
A filler strip is a piece of wood or plastic that is used to cover an opening or gaps in woodworking. The other filler is cut at 3 and sent loose to the job site so the installer has plenty of material to work with if the walls are extremely bad. To each measurement and draw a cutting line on the backside of a filler strip. But here the user can get easy tips, tricks, and tools on how to install cabinet filler strips easily. Place the strip against the wall and clamp it to the cabinet with a cabinet claw.
Kitchen cabinet filler strips | Kitchen cabinets ... from i.pinimg.com The line on the floor is your secondary guide. A filler strip is a piece of wood or plastic that is used to cover an opening or gaps in woodworking. Remove the filler and take it to a worktable to cut. Attach the filler strip to the cabinet with screws driven through the inside edge of the cabinet face frame and into the edge of the filler strip. Measure over from the wall to your pencil mark, and make a scribing block that size. We allow for a 1 filler on both sides of the cabinet. The method you use for installing the cabinet fillers is totally up to you. In this short video series i go into detail about the three scribes i typically use during installs and in this first part, i concentrate on #scribing #infil.
… filler strips are available to match almost all wood types and finishes that are used for cabinets, and they are fairly easy to install.
The horizontal line on the wall is your main guide. Test fit the cardboard into the hole. See filler installation on page 7. When you get to the end of the row, you may have a space between the hanging cabinet and the wall. Use a miter saw to cut the filler strip to the height of your cabinet. Measure over from the wall to your pencil mark, and make a scribing block that size. To each measurement and draw a cutting line on the backside of a filler strip. The filler strip should be a minimum of 1 1/2 inches wide, 2 inches is even better. Drill the holes and set the corner cabinet in place. Add filler strips and trim. Place the strip against the wall and clamp it to the cabinet with a cabinet claw. With manufacturers varying their cabinet design from plastic legs to solid wood bases there are a few tricks to installing toe kick. But here the user can get easy tips, tricks, and tools on how to install cabinet filler strips easily.